The Alertus Mass Notification System (Alertus System) is built on the power of the Alertus Server, and is managed through the Alertus user interface. You will need an account with Alertus first before integrating alerts through the EngagePHD software. For more information, please contact your EngagePHD representative.
The following are steps to create an Application to include the Alertus Mass Notification System.
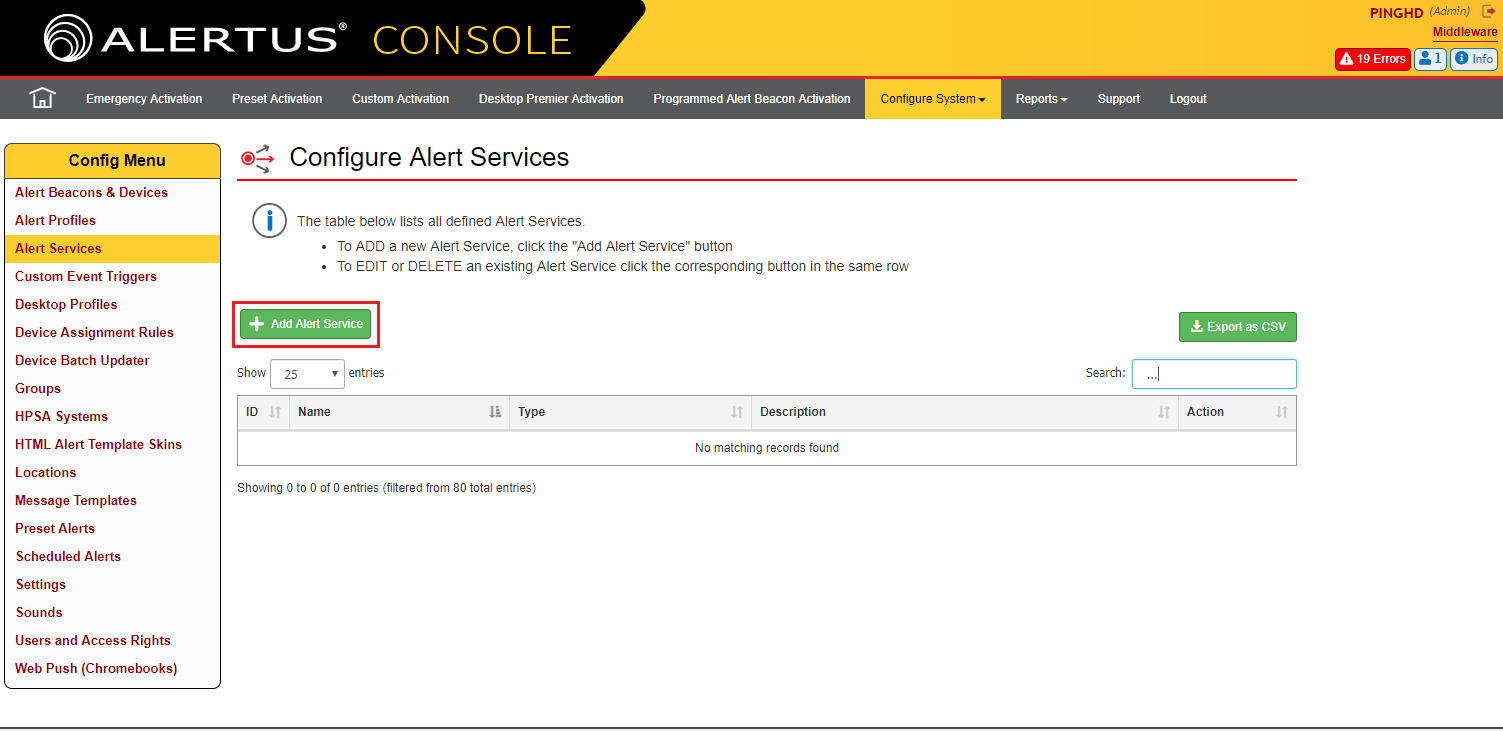
Log in to your Alertus account. Once you have logged in, you will need to go to Configure System > Alert Services and you will need to create either a) a HTTP Request or b) a CAP HTTP Post.
HTTP Request
HTTP Request will be used to trigger an Application Page within EngagePHD. In EngagePHD go to Applications and under Pages, click on the Link Generator button to get the trigger URL based on your “Group” and “Page” section. You will need this when you create your HTTP Request in Alertus.
Click on the + Add Alert Service button.
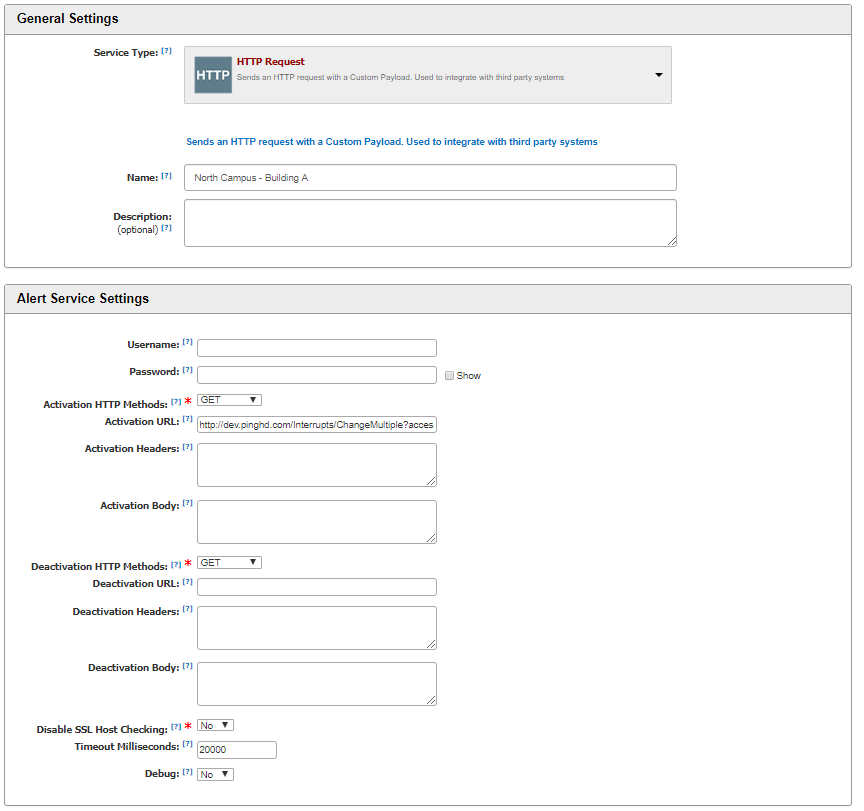
From the “Service Type” drop down menu, select HTTP Request.
- Define a meaningful name that encompassed location and groups if necessary. e.g. North Campus – Building A.
- Define the Activation URL this would be the URL generated in EngagePHD using the Application Page Link Generator, for example: http://dev.pinghd.com/Interrupts/ChangeMultiple?accessCode=160-Jm4&groupIds=113&pages=262
- Define a default Timeout in Milliseconds.
- Click the “Save Alert Service” Button
CAP HTTP POST
CAP HTTP POST is used where you want to define a real-time customized message that needs to be display on ALL screens or any Group of screens.
Click on the + Add Alert Service button.
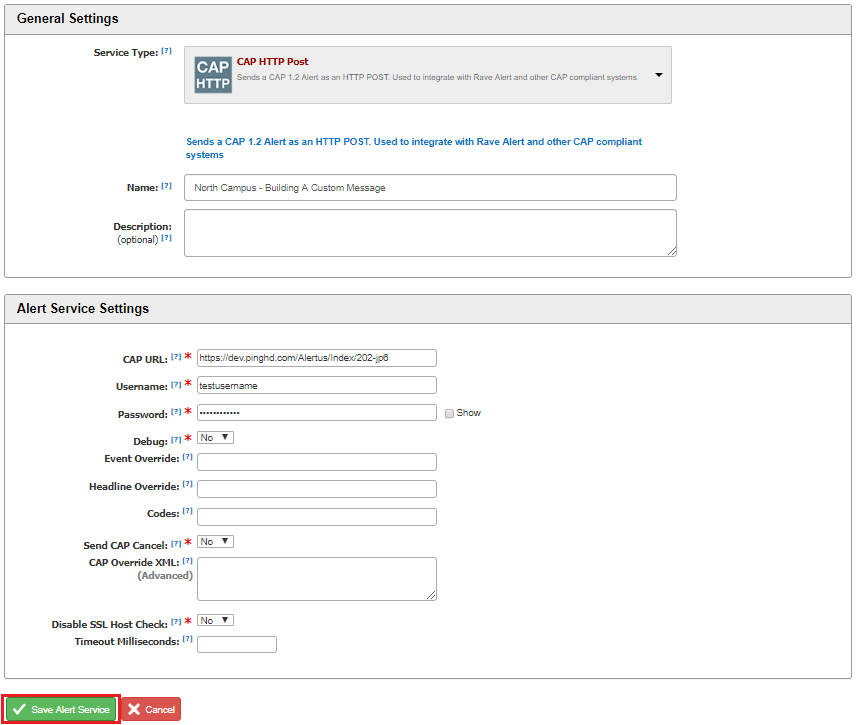
From the “Service Type” drop down menu, select CAP HTTP POST.
- Define a meaningful name that encompassed location and groups if necessary. e.g. North Campus – Building A.
- Define the CAP URL this would be the URL https://go.engagephd.com/Alertus/Index/202-jp6 where 202-jp6 would be the unique network ID for your EngagePHD network. Please contact hepdesk@pinghd.com if you need to find your unique EngagePHD network ID.
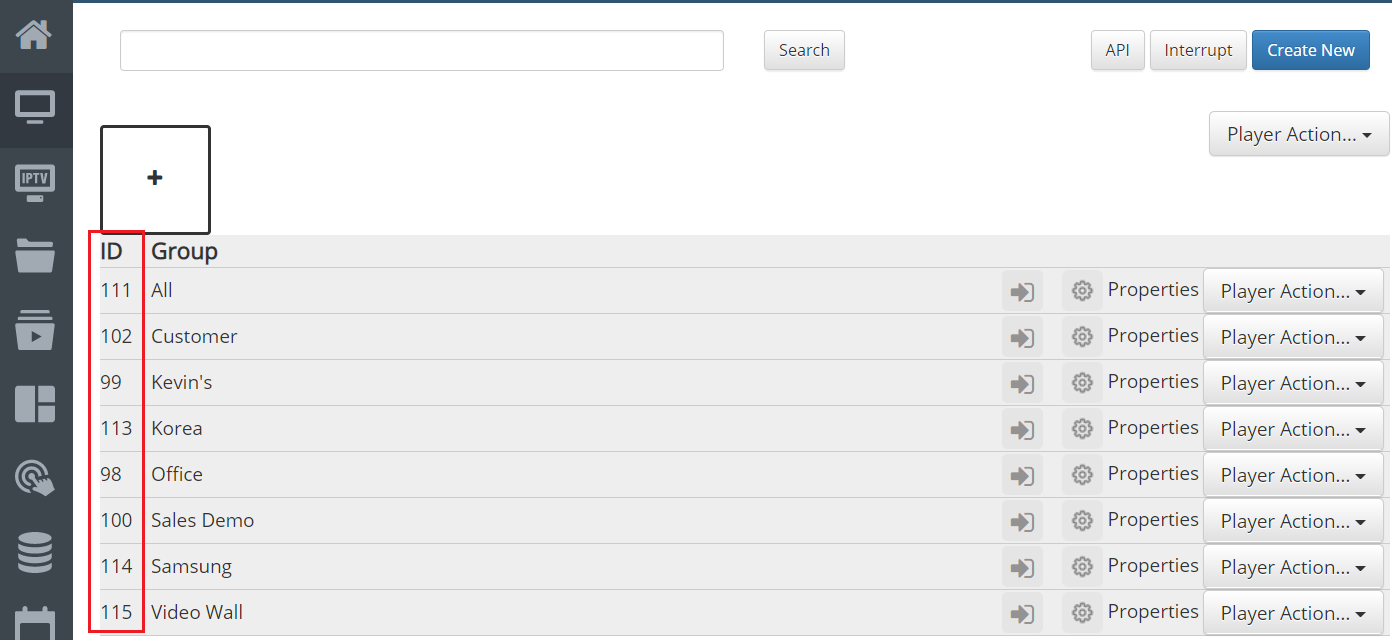
- If you wanted to target a specifc group of screens, change the above URL to be: https://go.engagephd.com/Alertus/Index/202-jp6?groupId=1234 again, where 202-jp6 is your unique EngagePHD network ID and groupId=1234 is the Group ID you want to trigger. To get your Group ID, just go to Players > Groups in EngagePHD and you will see the ID listed next to each group you have created.
- Define a default Timeout in Milliseconds.
- Click the “Save Alert Service” Button
Create Applications Page in EngagePHD
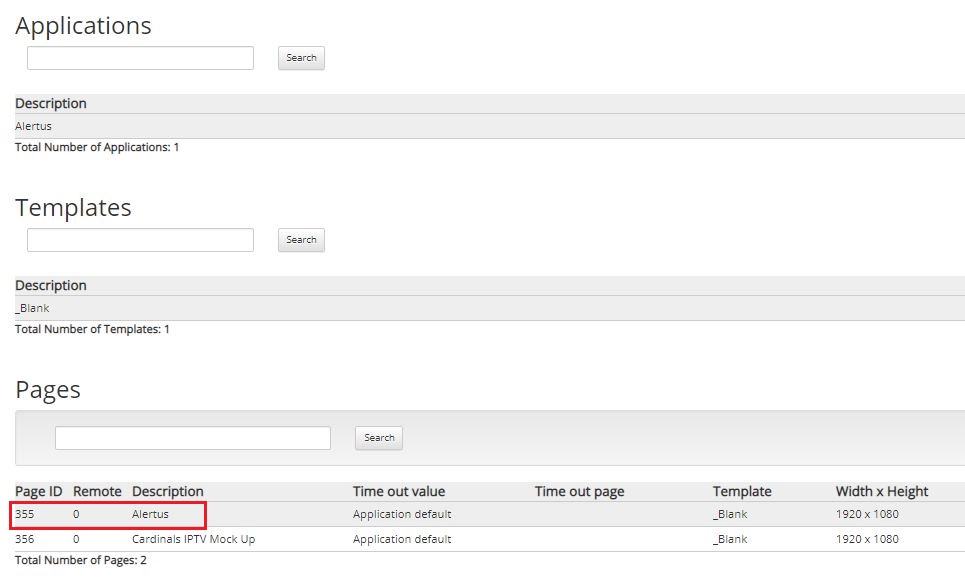
You will then need to create an Application Page in EngagePHD and ensure it is attached to the Application that will be scheduled to each display. The Page should be called Alertus (see below)
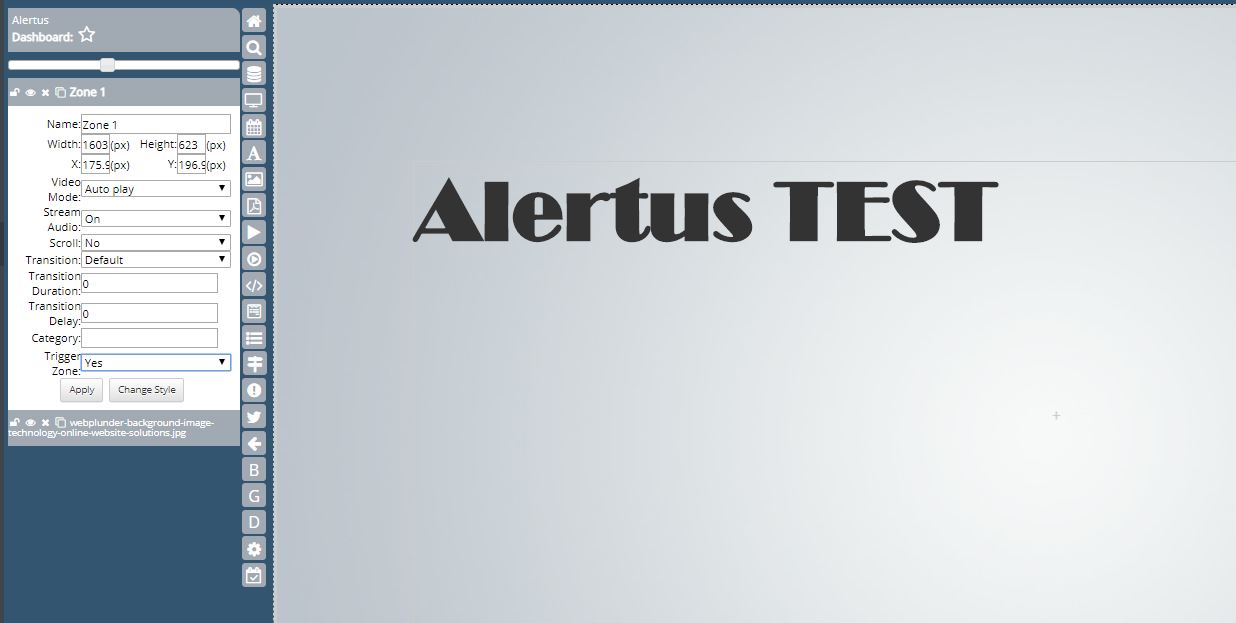
Creating the Text Zone in the Alertus Page Layout
Go into the Designer and click on the D button to go to the ‘Layout Designer V1′. Add a ‘Text Zone’ and type in Alertus TEST and define the Style of the font you wish to use. This style is what you custom message will use.
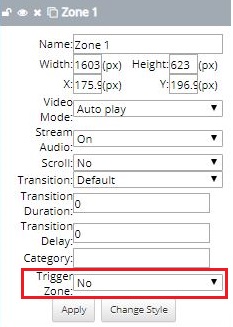
From the zone layer of your text, set the ‘Trigger Zone‘ to ‘Yes‘ and ‘Apply‘:
Then feel free to design the rest of the Layout however you want to based on any images, videos etc.. you want to show on screen as well.
You will then need to make sure that:
- a) You have created the Application with all the Pages you require and created the Alert Services in Alertus
- b) Create the Groups in EngagePHD
- c) Have the Application(s) running on your Players
Testing Alertus
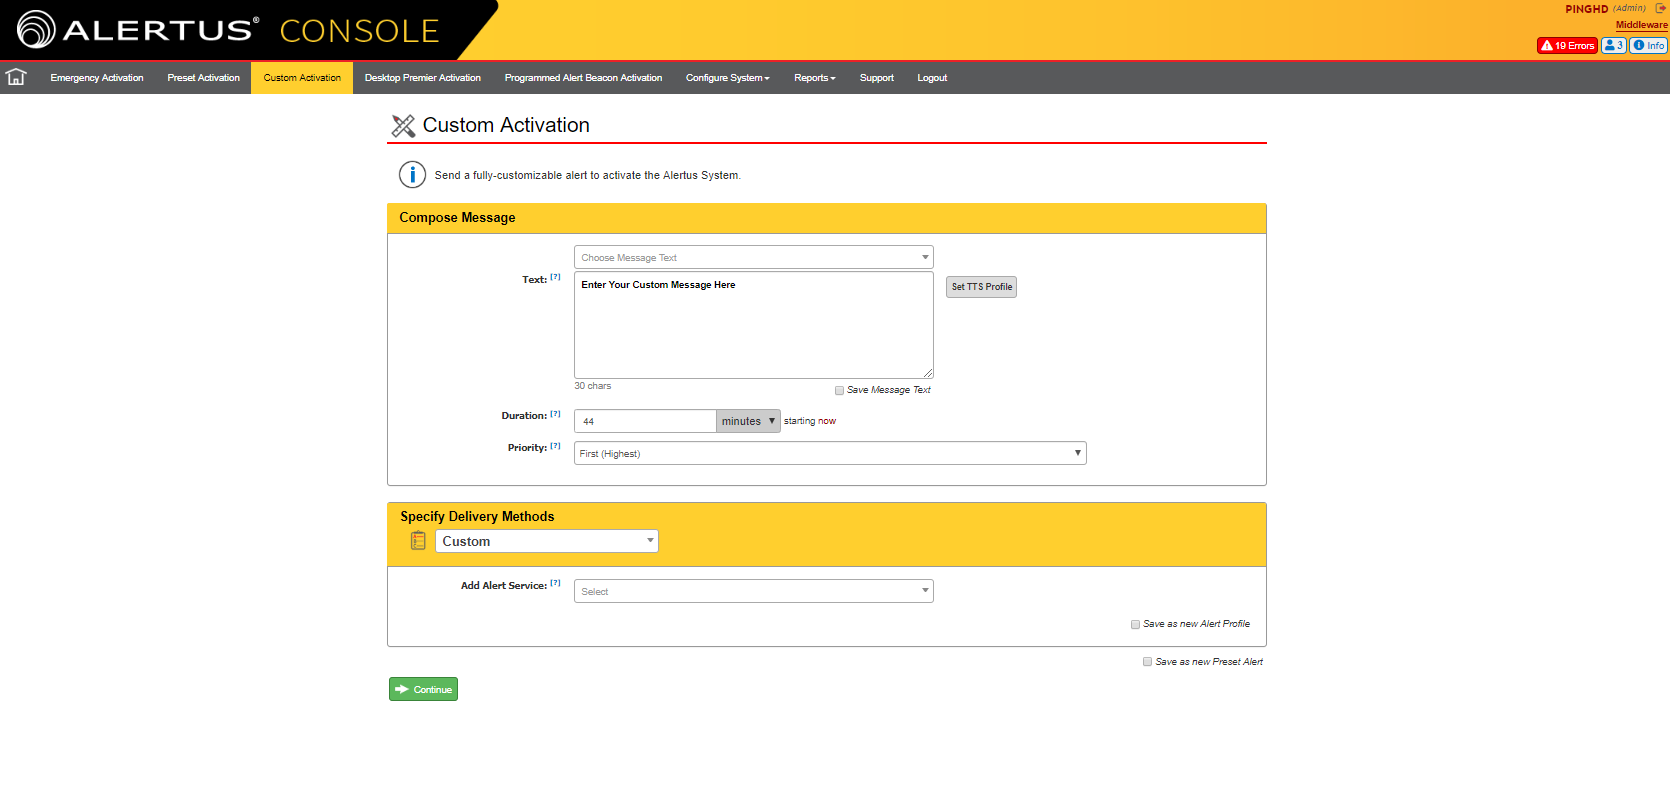
You are now ready to test…. Log into your Alertus account and click on Custom Activation.
If you are using Custom Messages, pick from your defaults or type your custom message
From the Specify Delivery Methods select the HTTP CAP POST you wish to use and click Continue. Check the information is correct, then click the Send button to instantly display that message on your screen(s).
If you want to trigger an EngagePHD Application Page, then repeat the steps above and select the HTTP Post Alert Service you created. You will need to define a custom message even though that will be ignored.