Once you’ve logged in you will be taken directly to your home page: Depending on your user access rights, you may not see all of the Home icons.
Help Menu
- Tickets – Tickets allow you to submit any software related questions or concerns to the EngagePHD Support Team. Or you can email videosupport@spectrio.com.
- Contact – This is where you can find the contact information for our 24/7/365 support team.
- Knowledge Base – This feature contains an FAQ/Searchable resource of information.
- EngagePHD News – This section will have release notes about the latest server updates and special announcements.
- Uptime – Shows the status of the EngagePHD servers.
By clicking on your name you can access the following:
- My Account – This is where you can update your user profile by selecting the language in which you prefer to use the EngagePHD™ application (English, French, German, Portuguese, Spanish), the time zone in which you are located and where you can change your password. You’ll also find customization options that will allow you as user to define how you want to view Playlists and Assets by default, Thumbnails vs. List view.
- Logout – Logs you out of the system

Full Network Menu
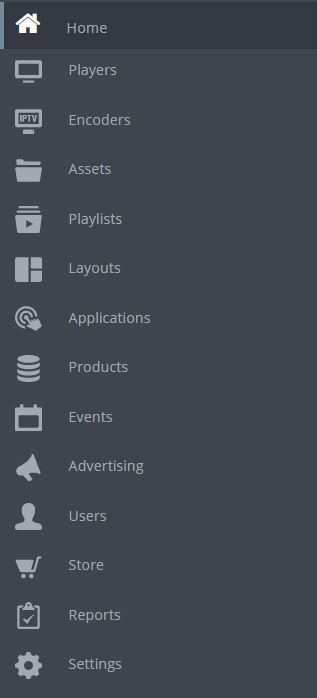
Players – This is where you add Player records, perform updates and check network status. This also where you can add player Groups, which allow you to build custom Groups and then perform a Player Action for that Group so that all players within that Group can be updated based on the Player Action performed at once.
You will also find the Map from the Players menu. This section allows you to view where you’re players are located on a map. The Map can be set up from the ‘Network’ icon on the Home page.
Assets – This is where all of your Assets are stored and uploaded. This includes images, videos and fonts.
Playlists – This is where you can create Playlists or edit existing Playlists. You can also define unique Asset playback attributes within this option.
Layouts – This is where you design your Layouts, set the properties and preview the menu to get the published URL.
Applications – This is where you can build touchscreen or other interactive applications based around designs you create in Photoshop or another design software.
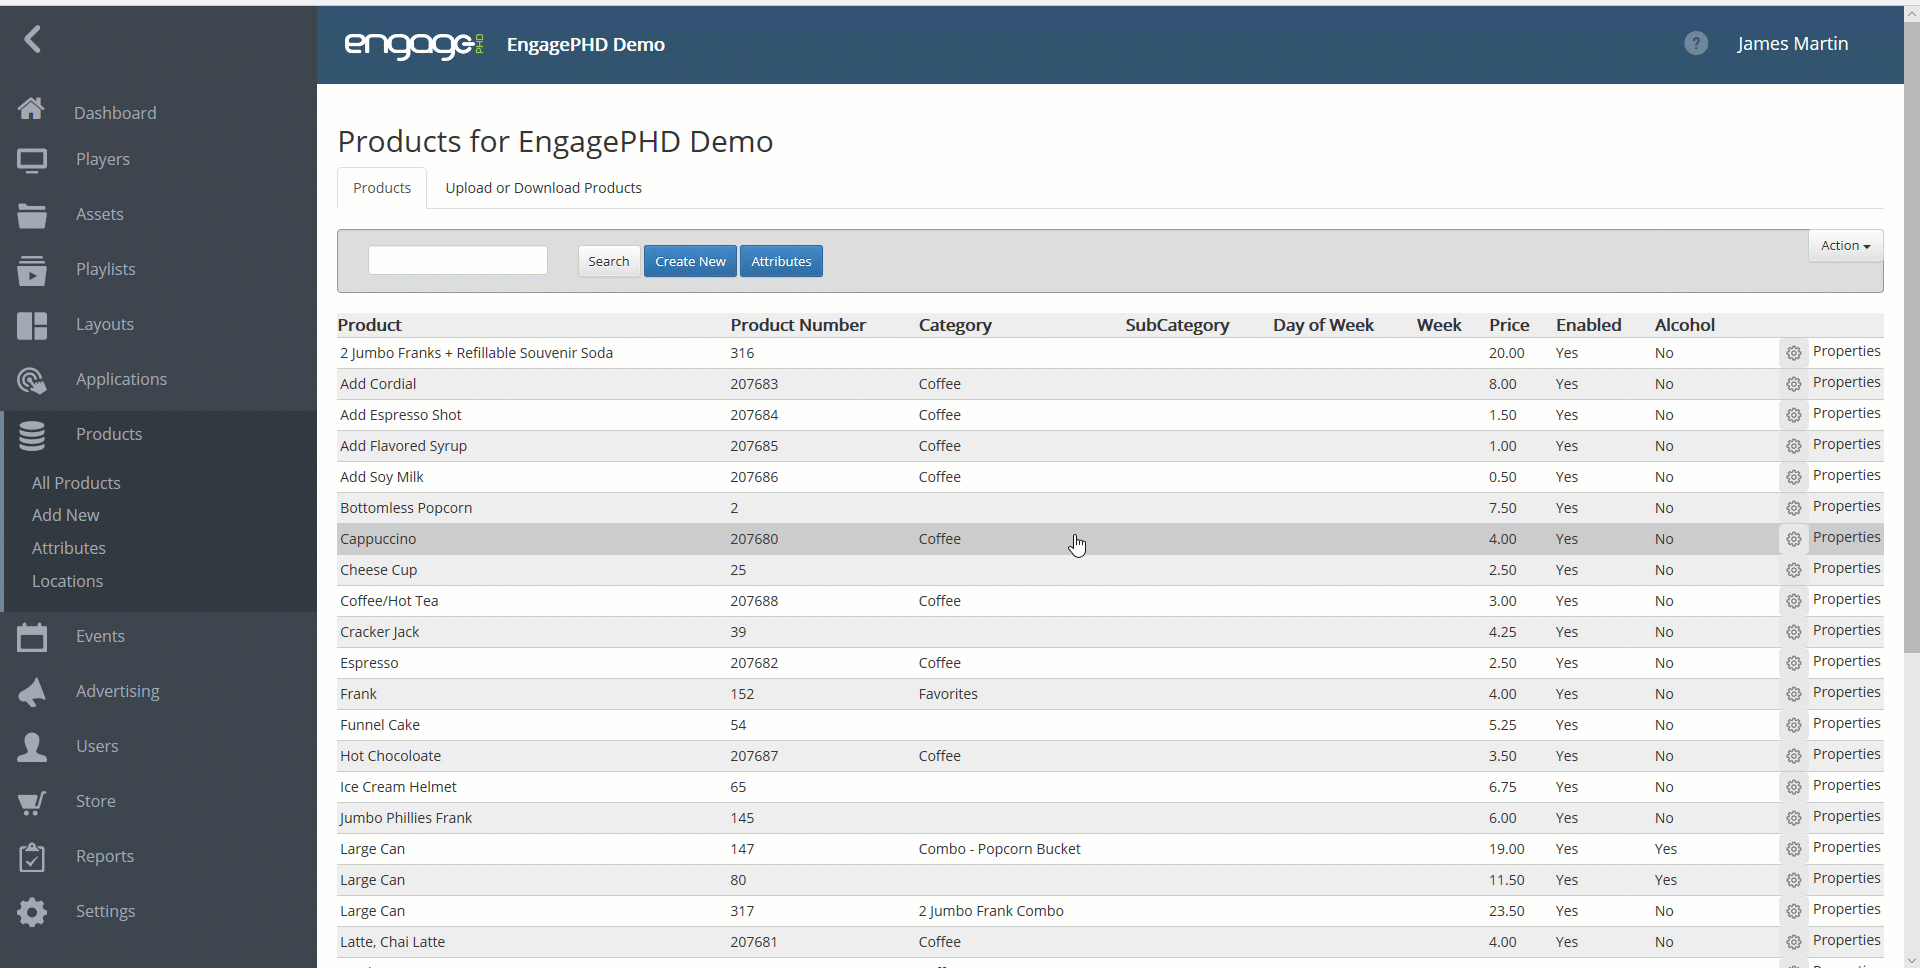
Products – This is where your Product database resides. This is used if your application for Digital Signage is Digital Menu Boards, although some users make good use Products for other applications.
Events – This is used where displays are being used for Room Signage or Wayfinding where you want to summarize events that are going on in specific rooms or areas. An Event can be created with a Start Date/Time and an End Date/Time, details of the Event and custom images/logos attached to the Event.
Advertising – The Advertising Module has been designed to allow users to manage advertising content/networks in a more advanced manner than just using a standard Playlist. Users can define rules relating to Playlist length/number of Assets and schedule Advertising Campaigns based on slot availability and location by Advertising Group or distance by geo location.
Users – With appropriate access rights, you can add additional Users, define which Customers or Networks the User can access or make changes to existing Users.
Store – The EngagePHD Store offers a wide range of free and paid content. Currently, you will find jpeg and png files that can be used in layouts, as well as widgets.
Reports – Reports allow you to run reports for various data for Players, Licenses; etc..
Settings – Within the Network properties you define the default attributes of the Network. This is where you can also subscribe to automated email alerts.
Home Dashboard
Quick Access – The quick access status bar shows various section of the software and their status. The ‘View All’ link under each section will take you to that section of the software.
Alcohol Action – This is where you can globally disable/remove all alcohol products from menus.
Player Licenses – A glance at active player license that have been assigned to Players, or not used and ready to be assigned. Clicking on ‘+ Add Player’ will allow you to assign an available license to one of your Players.
Favorite Players Screenshots – From the ‘Players’ section, you can flag favorite Players to show on your Home Dashboard. Screenshots will update for those players every 15 minutes (default).
Support Tickets – A glance at any Tickets that have been opened with our support team.